As another Labor Day comes to an end, I decided I should take some pics and show you some of what I have been working on the last couple of months! Just sew you know......... some of the items need little bits and pieces done before they are complete. Like topstitching, button, etc. Sew............ let me know what you think. I have more grab n go bags completed, and three other small purses, but I need to do more work on them before I post the pics. I have a jeans skirt that I made from an old pair of stove top jeans, haven't determined what design to embroidery yet - I am thinking a tone on tone paisley. Also have most of the blocks completed for the Suspender Sam quilt.
All of the Market Totes are fully lined, have a removable plastic insert in the bottom, and made from 100% cotton. You can fold, roll and tie to make easy storage. (Ribbon on the side of the purple stripe). (I have to add the ribbon to each this week.) I will take some pics later in the week, sew you can see the lining color.
If.......... you did not receive the updated instructions for the market bag made from the table runner......... let me know. I think I emailed everyone.
Enjoy!
Monday, September 6, 2010


Thursday, May 27, 2010
Grab N Go Bags
These bags are really great grab and go bags. Sews up quickly and the size can be easily adjusted. Think of the possibilites..... . (I know I should take pics after the final press... sew excuse the wrinkles)


Friday, April 30, 2010
Table Runner Grocery Tote
 Fold short sides together and cut in half.
Clean finish the two cut edges.
Lay out in "t" and top stitch as shown in red.
This is actually the back side of the table runner. The person I am making it for is not so much a floral person. I will add another pic of the inside of the bag. I suppose it is actually reversible - the straps would just be on the inside.
I did find a difference in the front and back. The front has fused interfacing, the back had fusible interfacing but was not fused. The front was crisp and smooth. The back had a little extra fullness. The back wrinkles/creases, but that is ok - I am sure after it is used a couple of times it will be fine. It will soften after a couple of washings also.
Sew.... look thru your linens, you never know what treasures you have. Or how about that table runner that you never use? Ohh .... something else to look for at the thrift shop. I will post the rest of the instructions in a few days -( I know you are not ready to start the project). Enjoy

Friday, April 23, 2010
5 Pillowcases


Monday, April 19, 2010
Books, Books and more Books
Check out a few of these books, I think you will enjoy!
99 Ways to Cut, Sew, Trim & Tie Your Tshirt
99 Ways to Deck Out Your Denim
Sew & Stow: 31 Fun Sewing Project
Pattern-Free Fashions & Accessories
Sew Stylish: Easy-Sew Ideas for
Pretty Little Purses & Pouches
Simple Gifts to Stitch : 30 Elegant
The Feisty Stitcher
Martha Stewart's Encyclopedia of Fabric
Bend the Rules Sewing: the Essential
One Yard Wonders
Seams to Me: 24 new reasons to love
Crafty Chica Guide to Artful Sewing
ok - I typed this list from my receipt from the public library - so the complete title may not be listed here. Everyone of these books has great projects (I know - I need more "projects"). Literally - something for everyone. Sew......... if you need a little inspiration just head to your local library!
Thursday, April 15, 2010


Wednesday, March 24, 2010
Update to "the Bounty" and "the Suitcase" - the fabric is identified!!!
A great big thank you to Glenna Tull Hailey for identifying my fabrics!! Thank you Glenna!
Hi Cathi-- Just took a look at your pics. Fun stuff! These fabrics are generally from the 30's - 50's. The 6 pointed stars are earlier, probably from the 30's maybe into the 40's. The small squares are definitely later, from the 50's possibly into the 60's. The eight pointed stars with the plaids look 50's to me and the one on the right may be feedsack. The double wedding rings have a wide variety and looks like some feedsack in those. This is not uncommon at all to find these together. People saved their fabric then, just like we do! I have fabric from the 80s, 90s, 2000s in my stash. Quilts are dated from the latest fabric they have in them. I sure hope this helps and if you have any more questions, please get in touch! Thanks so much--- Glenna
Hi Cathi-- Just took a look at your pics. Fun stuff! These fabrics are generally from the 30's - 50's. The 6 pointed stars are earlier, probably from the 30's maybe into the 40's. The small squares are definitely later, from the 50's possibly into the 60's. The eight pointed stars with the plaids look 50's to me and the one on the right may be feedsack. The double wedding rings have a wide variety and looks like some feedsack in those. This is not uncommon at all to find these together. People saved their fabric then, just like we do! I have fabric from the 80s, 90s, 2000s in my stash. Quilts are dated from the latest fabric they have in them. I sure hope this helps and if you have any more questions, please get in touch! Thanks so much--- Glenna
Sunday, March 21, 2010
ramblings, rachel bag and felted wool
I looked at the pics for the Rachel Bag and they do not do any justice for the bag - looks pretty sad - actually. You do not see the top that folds over or the top band, etc. My aunt loves the bag - it opens down the back with a zipper. I will have to try and take better pics.
Felting Wool - I was lucky enough to have a neighbor give me a man's black wool dress coat (the moths had gotten to it). Last night I disassembled part of it and did wash and dry - however - I have a front loader machine and just as I thought - it did not work. Sew..... I will take it to a friend’s house that has a top loader washer and wash away. I also have three wool sweaters that I have washed and dried a couple of times and I am beginning to see a difference, and yes, they did shrink some. I will take them along with the black wool and see if I can actually "felt" the wool. Can't say why I am so obsessed with felting wool - just am.
Felting Wool - I was lucky enough to have a neighbor give me a man's black wool dress coat (the moths had gotten to it). Last night I disassembled part of it and did wash and dry - however - I have a front loader machine and just as I thought - it did not work. Sew..... I will take it to a friend’s house that has a top loader washer and wash away. I also have three wool sweaters that I have washed and dried a couple of times and I am beginning to see a difference, and yes, they did shrink some. I will take them along with the black wool and see if I can actually "felt" the wool. Can't say why I am so obsessed with felting wool - just am.
Monday, March 1, 2010
One Million Pillowcase Challenge
This is a great group project - all you need is a little bit of fabric and about 30 min of your time. Most of the local quilt shops are accepting the completed pillowcases and will donate to local charities, or you can deliver the pillowcases yourself. I belong to one online group and we are doing as a group project - we will each take our pillowcases to a drop off site in our individual community - everything stays local. Here is a link if you are interested: http://www.allpeoplequilt.com/millionpillowcases.
I hope all of you will take this challenge - what a great way to use up some of your stash. I think I will also make a few from some of my holiday fabrics - might be kind of fun! If you need some fabric, let me know ok?
I hope all of you will take this challenge - what a great way to use up some of your stash. I think I will also make a few from some of my holiday fabrics - might be kind of fun! If you need some fabric, let me know ok?
the"Rachel Bag" - for my "purse making" friends
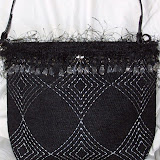
 This bag is from the book "Bag Boutique : Making Fabulous Purses and Totes" by Amy Barickman, Indygo Junction Design Team. The purse is really fun and pretty quick to put together. The bottom band and inside are made from a gold silk, the body of the bad is a home dec remnant I found in my stash. I lined each piece before assembly to give a little more stability to the seam allowances. I have had this fabric for quite some time - just could not decide what to with it. (it kept saying "purse" -but I wasn't listening). I love the patterns in this book, if you are a purse maker, be sure to check it out.
 Hint - I use the hard plastic placemats for the bottom liner in my purses and totes. The placemats are easy to cut and give quite a bit of stability for the base and are inexpensive.
Below is a close up of the trim. This is actually a free w/order from Fire Mountain Gems - worked out great! If the bag looks a little out of shape - it is because it is stuffed with tissue paper. I thought it would help with stability for pic taking. However - made it look worse - but you get the idea of the bag. The colors are much bolder than they appear in the pics and the purse has not had the final pressing. I wait until the day I am ready to deliver for the final pressing.


Monday, February 22, 2010
Circular Vest update
I decided I should make a circular vest using fleece (as shown in the article) before cutting the collar on the corduroy vest and I am glad I did. The vest actually needs to be 2" smaller - the fit is much better. I also turned under 1/2" on each side of the armhole slit and used a blanket stitch. I think the location of the armhole is not "just right" for me - so I will work on that a bit. I am just going to turn the edge under 1/2" and blanket stitch each side. I think this vest will work best for me as just a lightweight jacket instead of the fleece. Perfect for a sleeveless top or dress (since I prefer to hide the arms). I will post a pic when I have it completed.
Tuesday, February 9, 2010
Bowties and More
In my quest to find all the UFO's I have stashed everywhere - I came across a bunch of Bowtie quilt blocks that I had pieced while learning to hand piece - sew........ not sew perfect blocks (heard this before?), some stretched, none the same size, and then of course a few of my "least" fav fabrics. Once again I just started sewing them together, and ended up with a baby sized quilt top. I had a crib sized batting in the stash - it is the fuseable type - which I have not used before. (won't use that product again). Short story even shorter - I had planned to use this as my second donation quilt - but that batting is really thin and I do not think the quilt will be that warm - Sew.......... I think I can turn it into some type of bunting or wrap for baby.
Sew, I am glad I have two ufo's finished and (if I may say so) - it make me feel good to know that I can give back in some way.
Sew, I am glad I have two ufo's finished and (if I may say so) - it make me feel good to know that I can give back in some way.
Thursday, January 28, 2010
Wednesday, January 27, 2010
"the Suitcase" and "the Bounty"
Can you date or identify any of the fabrics pictured in either of these to blogs? Let me know - please and thank you! (smile and curtsey)
Monday, January 25, 2010
Circular Vest
 This is cut using the circumference as described in the instructions, the armhole measurement is 4.5" longer than listed in the instructions. The "collar" roll line is in line with the top of the armhole opening. The bindings are not yet sewn.
  This fabric is a patchwork corduroy and the edges have stretched a bit. The seams of the patchwork are serged, with does not allow the fabric to drape as I had hoped it would. I think a fleece or soft fabric would have a much better drape.
As you can see, I have the front pinned and it overlaps slightly. A button and small loop for a closure, would meet the two front edges. (It looks like the vest pulls across the stomach area - but that is due to the pinning and I have on a couple of layers).
 In this view, I have pulled the "collar" up, which allows for more of an overlap in the front. I like this style the best.
 Now - about this fabric. The collar is the right side of the fabric with the body being the wrong side. I am going to pin the complete roll line, press and then cut the circle apart half inch below the pressed line. I will then sew it back together, right side to wrong side, so the completed vest will have the right side of the fabric for the body and collar. Yet another reason to use fleece or fabric with no right and wrong side. (Sheer, knit, etc)
Wednesday, January 13, 2010
Red, White and Sew Blue

A few months ago as I was unpacking from yet another move I found this blue fabric in my stash. I can honestly say I do not remember how long it had been there (sound familiar?). I decided I would just add wide borders and hope that it would work for a baby or lap quilt. I quickly sat down and sewed the borders, only to realize that the top had stretched, was not square and anything else that could be wrong -was. Banished to the closet again.
In December, I decided my sewing goals for 2010 were 1. Finish all UFOs 2. Sew from my stash 3. make one donation project each month. Sew - out of the closet it came, I used the same blue for the back - I used upholstery flannel for the batting and I just started stitching in the ditch across each row. Really was not looking that great because of the mistakes made while piecing - but I was not going to stop! I just stitched row after row of stitches, both vertical and horizontal - my own version of stippling. This will be my first donation project for 2010. Its not perfect, may not even be "squared" when finished - but it will be warm and I know it will be used.
Subscribe to:
Comments (Atom)